Healthier Crispy Baked Chicken Tenders: A Family Favorite Recipe
There’s an undeniable charm to golden-brown chicken tenders – that satisfying crunch, the juicy interior, and the universal appeal that makes them a go-to for kids and adults alike. For many, this comfort food evokes nostalgic memories of drive-thrus and restaurant menus. But what if you could recreate that irresistible experience at home, not only enhancing the flavor but also making it significantly healthier and without the greasy mess of deep frying? Say goodbye to questionable ingredients and excess oil, and prepare to welcome the ultimate baked chicken tenders recipe into your family’s meal rotation. This isn't just another oven-baked recipe; it's a method meticulously crafted to deliver tenders that are truly *crispy* on the outside and wonderfully *juicy* on the inside. Imagine a platter piled high with these delectable morsels, glistening with a light golden hue, ready to be dunked into your favorite dipping sauce. They offer the iconic, shattering crispness of a deep-fried classic, but with a fraction of the oil and none of the stovetop hassle. It’s a game-changer for weeknight dinners, guaranteed to disappear instantly, and even versatile enough to star in a hearty Chicken Parmesan Sub or a fresh salad. Get ready to discover your new family favorite.The Secret to Unbeatable Crispy Baked Chicken Tenders
Achieving truly restaurant-quality baked chicken tenders that rival their fried counterparts requires a few clever techniques. It's not just about tossing chicken in breadcrumbs and baking; it's about building layers of flavor and texture that guarantee a superior result. We've honed in on the elements that transform good tenders into truly exceptional ones, ensuring every bite is a delightful combination of savory and crunchy.The Essential Flavor-Infusing Batter
The first secret weapon in our arsenal is a specially formulated wet batter that does double duty. Unlike a simple egg wash, this batter ensures the breadcrumbs cling to the chicken like a second skin, preventing them from falling off during baking. But its benefits extend far beyond mere adhesion. This isn't just a binder; it's a flavor enhancer and a moisture lock. Our unique batter starts with a whisked egg, the primary binder, but then elevates with several key additions:- Sour Cream: This might seem unusual, but sour cream is a secret ingredient for tenderness and moisture. Its acidity helps to tenderize the chicken subtly, while its fat content ensures the meat remains incredibly juicy through the baking process.
- Flour: A small amount of flour helps to thicken the batter, providing a more robust base for the breadcrumbs to adhere to and contributing to the overall crispness.
- Subtle Flavor Enhancers: A hint of Dijon mustard, a dash of hot sauce (don't worry, it's not spicy, just adds depth!), and a touch of honey are incorporated. These ingredients are flavor chameleons; you won't taste them outright, but they contribute a profound umami and roundness to the flavor profile, making the chicken incredibly savory and moreish.
Mastering the Golden Crunch: Buttery Toasted Panko
The second, and perhaps most crucial, secret to these incredibly crispy baked chicken tenders lies in our innovative approach to the breading. We don't just use any breadcrumbs; we use Panko, and we treat it with respect. Panko breadcrumbs are naturally superior for crispiness due to their larger, flakier texture, which absorbs less oil and stays crispier than traditional breadcrumbs. But we take it a step further:Before coating the chicken, the Panko breadcrumbs are tossed with melted butter and then toasted in the oven. This pre-toasting step is nothing short of revolutionary for baked chicken. Here's why:
- Enhanced Crispiness: Toasting the Panko pre-emptively dries it out and crisps it up. When it then goes on the chicken and back into the oven, it achieves an unparalleled crunch that mimics deep-frying.
- Golden Color: The butter helps the Panko achieve a beautiful, even golden-brown color during the initial toast, which translates to a gorgeous finish on your tenders.
- Buttery Flavor: Infusing the Panko with butter adds a rich, savory depth that is simply irresistible.
- Umami Boost: A sprinkle of Parmesan cheese is mixed into the toasted Panko, providing a natural umami kick and an extra layer of savory deliciousness that makes these tenders truly addictive.
Step-by-Step Guide to Perfect Baked Chicken Tenders
Making these baked chicken tenders is surprisingly simple, despite the impressive results. A little preparation goes a long way, and following these steps will ensure success every time.Prepping Your Chicken for Success
Start with boneless, skinless chicken breasts or tenderloins. While tenderloins are naturally uniform, using chicken breasts allows for greater control over thickness and size.- Slice & Pound: If using breasts, slice each lengthwise into 3-4 even strips. For consistent cooking and tenderness, place the chicken strips between two sheets of plastic wrap and gently pound them to an even ½-inch thickness using a meat tenderizer or a rolling pin. This ensures they cook uniformly and remain tender.
- Season Lightly: A simple sprinkle of salt and freshly ground black pepper on both sides is all you need before the flavorful batter takes over.
- Marinate in Batter: Combine your batter ingredients (egg, sour cream, flour, Dijon, hot sauce, honey) in a medium bowl. Add the chicken strips, ensuring they are fully coated. Let them marinate for at least 15 minutes at room temperature, or cover and refrigerate for up to 4 hours for deeper flavor development and tenderness.
Assembling Your Breading Station
- Toast the Panko: In a medium bowl, combine 1.5 cups of Panko breadcrumbs with 3 tablespoons of melted butter and 2-3 tablespoons of grated Parmesan cheese. Spread this mixture evenly over a large, light-colored baking sheet. Bake at 375°F (190°C) for about 6 minutes, or until golden and fragrant, stirring once halfway through. This crucial step is what gives your tenders their signature crispiness.
- Transfer & Coat: Once toasted, transfer the Panko mixture back to a shallow bowl. Working with one piece at a time, lift a chicken strip from the batter, letting any excess drip off. Dredge it thoroughly in the toasted Panko mixture, pressing gently to ensure a thick, even coating on all sides.
- Prepare for Baking: As you bread each tender, transfer it to a wire cooling rack set over the same large baking sheet. This setup is crucial for air circulation around the entire tender, allowing it to crisp up evenly on all sides without getting soggy on the bottom.
Baking for Golden Perfection
With your tenders prepped and coated, it's time for the final bake.- Preheat: Ensure your oven is fully preheated to 375°F (190°C).
- Bake: Bake the baked chicken tenders for 18-20 minutes, or until they are golden brown, cooked through, and reach an internal temperature of 165°F (74°C). The exact time may vary slightly depending on the thickness of your chicken.
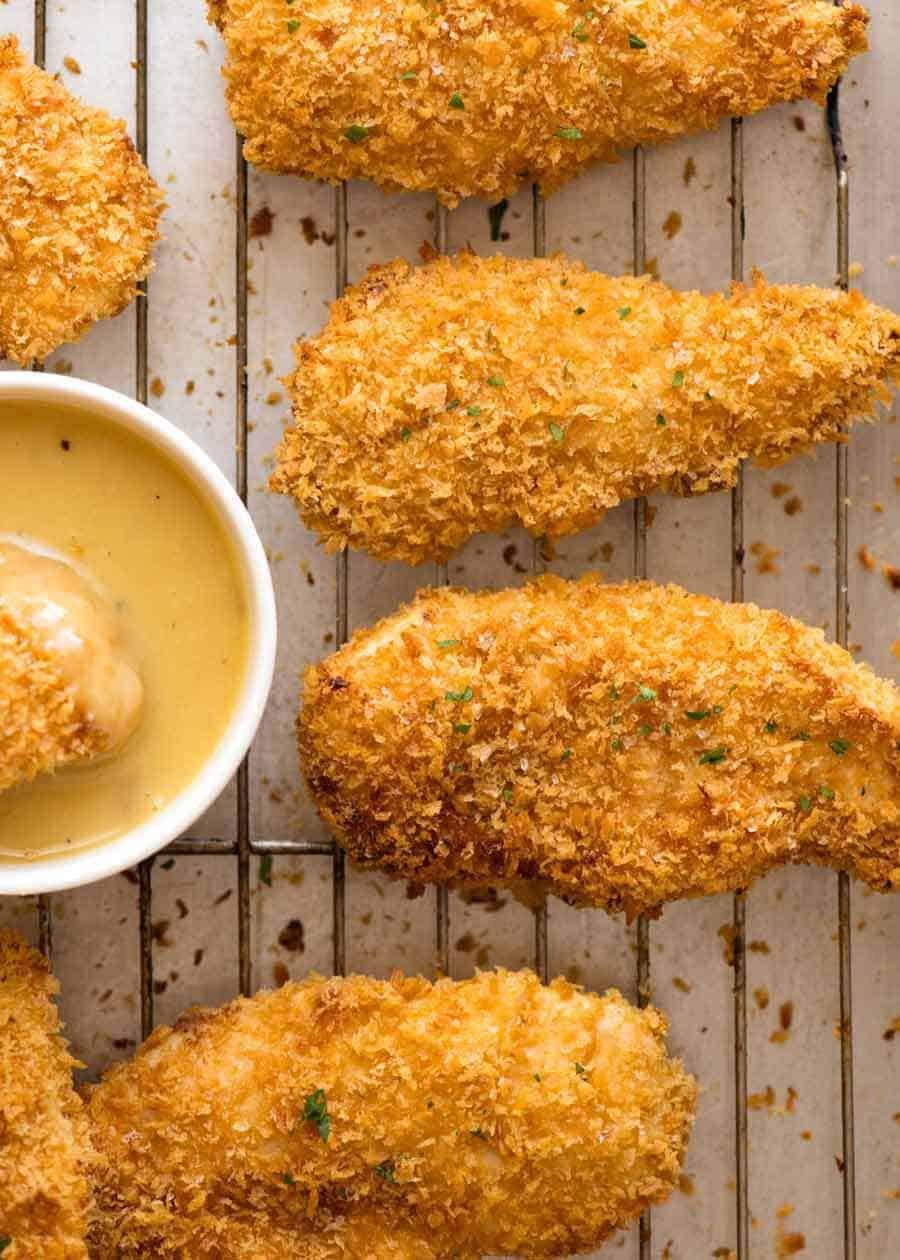
- Serve Immediately: Remove from the oven and serve hot with your favorite dipping sauces, such as homemade honey mustard, ranch, BBQ sauce, or even a spicy sriracha mayo.
Pro Tips for Your Best Baked Chicken Tenders Yet
Elevate your baked chicken tenders game with these additional insights and serving ideas:- Chicken Cut Versatility: While chicken breasts work wonderfully, feel free to use pre-packaged chicken tenderloins if you prefer. Just adjust pounding slightly if needed to ensure even thickness.
- Don't Skip the Wire Rack: We mentioned it, but it bears repeating: baking on a wire rack is non-negotiable for ultimate crispiness. It allows hot air to circulate underneath the chicken, preventing a soggy bottom. For more tips on achieving the perfect crisp, read our article Baked Chicken Tenders: Achieve Ultimate Crispiness & Juiciness.
- The Flavor Profile: Trust the process with the subtle flavor enhancers in the batter. They truly make the tenders more complex and delicious without overpowering the natural chicken flavor.
- Make-Ahead & Freezing: These tenders are fantastic for meal prep! You can bread them and freeze them uncooked on a baking sheet, then transfer to a freezer bag. Bake directly from frozen, adding an extra 5-10 minutes to the cooking time. Cooked tenders can also be reheated in the oven or air fryer for best results.
- Dipping Sauce Extravaganza: While a classic honey mustard is always a hit, experiment! A creamy garlic aioli, a tangy ketchup, or even a sweet chili sauce can transform the experience.
- Beyond the Plate: These tenders are incredibly versatile. Serve them on their own, alongside a fresh salad, tucked into a warm bun for a chicken tender sandwich, or sliced over a bowl of pasta for a healthier take on chicken parmesan.
